

The retail checkout process is the systematic sequence of steps a retailer follows to complete a customer transaction accurately, from scanning the first item to issuing the final receipt. Get it wrong and you lose more than a sale. Retail experts link checkout ease directly with repeat business and customer loyalty, which means every friction point at the till costs you long term. This step by step retail checkout guide covers everything you need: the right hardware, the correct transaction sequence, common pitfalls, and staffing tactics that keep queues short and customers satisfied.
What tools and systems do you need before starting the retail checkout process?
A well-prepared checkout station is the foundation of every smooth transaction. Before your first customer reaches the till, you need the right hardware, software, and trained staff in place.
Essential POS hardware
Every retail checkout station requires a core set of physical components:
- POS terminal or cash register — processes transactions and displays item totals. Terminals from brands like SAM4S and iMin, both distributed by Ycr, combine reliability with fast processing.
- Barcode scanner — reads product barcodes to pull accurate pricing from your inventory database. Handheld and fixed-mount scanners suit different counter layouts.
- Receipt printer — produces paper or email receipts for customers and transaction records for your accounts.
- Cash drawer — stores notes and coins securely. Physical orientation of the cash drawer matters: face it away from customers to reduce the risk of reach-in theft.
- Card payment terminal (EFT device) — handles chip-and-pin, contactless, and mobile payments. An integrated EFT device removes the need for manual entry of card totals.
- Customer-facing display — shows the running total to the customer, reducing disputes and building trust.
Software and integrations
Your point of sale software ties the hardware together. It must connect to your stock management system so that every scan updates inventory in real time. Software like SAMTOUCH and EZEEPOS, both available through Ycr, are built specifically for retail environments and handle everything from VAT calculations to end-of-day reports. Check that your software supports split payments, discount codes, and loyalty schemes before you go live.
| Component | Purpose | Key requirement |
|---|---|---|
| POS terminal | Processes transactions | Fast processor, touchscreen |
| Barcode scanner | Reads product codes | Compatible with your database |
| Receipt printer | Issues customer receipts | Thermal or inkjet, fast print speed |
| Cash drawer | Stores cash securely | Lockable, correctly oriented |
| EFT device | Handles card payments | Contactless and chip-and-pin support |
Staff training and workspace setup
Hardware and software only work when your team knows how to use them. Every cashier needs a written standard operating procedure (SOP) covering login, scanning, discounts, payment handling, and end-of-shift cash reconciliation. Run new staff through at least two supervised shifts before they operate a till independently. Keep the counter clear of personal items, and position your retail checkout setup so the screen faces the cashier and the cash drawer faces away from the customer queue.

Pro Tip: Test every peripheral, including the scanner, printer, and card terminal, at the start of each trading day. A two-minute check prevents a ten-minute queue during peak hours.
How do you execute the retail checkout transaction step by step?
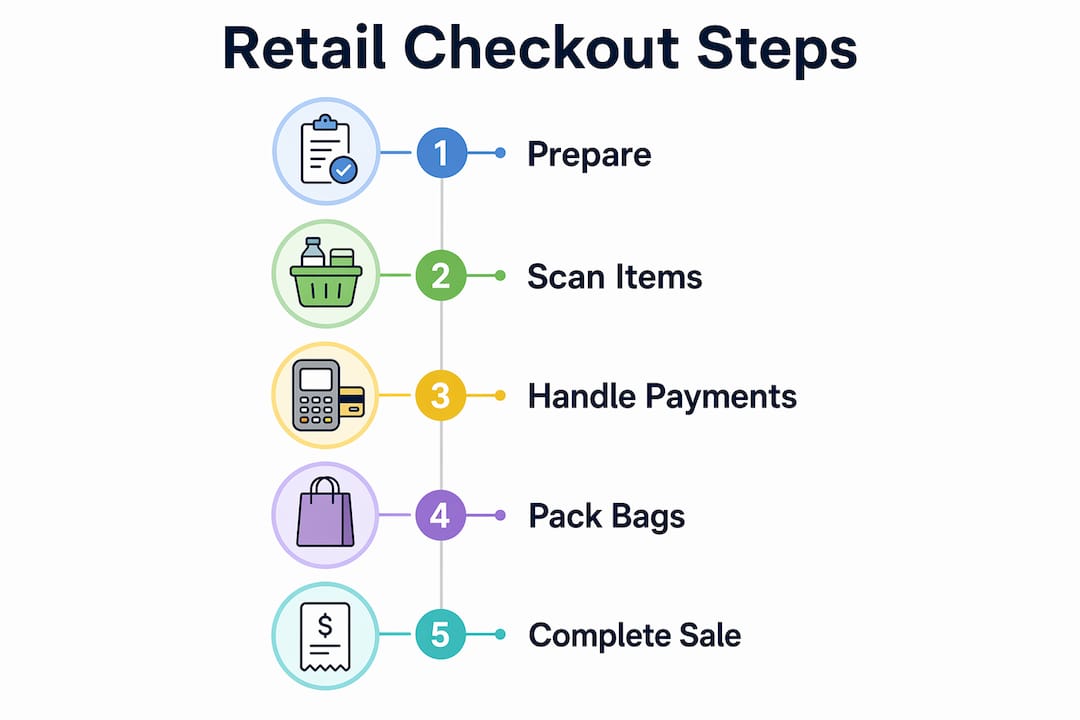
This is the core of the retail payment procedure. Follow these steps in sequence for every transaction.
-
Log in to the POS system. Each cashier must log in with their own credentials. Individual logins create an audit trail and make it straightforward to trace any errors back to a specific session.
-
Greet the customer and begin the transaction. Open a new sale on the terminal. A brief, friendly greeting sets a positive tone and signals to the customer that you are ready.
-
Scan each item. Pass every product over the barcode scanner. For items without a barcode, use the manual search function to find the correct SKU. Never guess a price or enter a figure from memory.
-
Handle manual price entries with a reason code. When a barcode will not scan, enter the price manually and log a reason code in the system. Manual price overrides without logged reason codes introduce risks of shrinkage and fraud. Reason codes create accountability and protect both the business and the cashier.
-
Apply discounts and promotions. Enter any loyalty points, discount codes, or promotional prices before confirming the total. Always show the customer the adjusted total on the customer-facing display before asking for payment.
-
Confirm the total with the customer. State the amount clearly and give the customer a moment to check it. This single step prevents the majority of post-transaction disputes.
-
Process payment. Accept the customer’s chosen payment method:
- Cash: Take the notes, enter the amount tendered into the system, and let the POS calculate the change. Count the change back aloud to the customer using the “Art of Counting Back” method, where you start from the transaction total and count up to the amount tendered. This counting-back policy prevents disputes and saves time.
- Card: Present the EFT device to the customer. Wait for the authorisation confirmation before closing the sale. Never assume approval before the terminal confirms it.
- Vouchers or gift cards: Apply the voucher value first, then process any remaining balance by cash or card. Mixed payment scenarios commonly cause errors unless the POS system validates vouchers and calculates remaining balances automatically.
-
Issue the receipt. Print or email the receipt and hand it to the customer. Ask whether they prefer paper or digital before printing, as many customers now prefer a digital copy.
-
Close the transaction and reset. Close the sale on the terminal, ensure the cash drawer is shut, and prepare the station for the next customer. The drawer should remain closed at all times except during active cash handling.
Pro Tip: If a customer queries a price mid-transaction, pause the sale rather than rushing through. A 30-second price check is far less damaging than a refund queue later.
How do you troubleshoot and avoid common checkout pitfalls?
Even a well-prepared checkout station encounters problems. Knowing how to respond quickly keeps queues moving and customers calm.
Common issues and how to handle them:
- Barcode will not scan. Clean the scanner glass first. If the barcode is damaged, use the manual search function and log a reason code. Never enter a price from visual memory alone.
- Price discrepancy. If the scanned price differs from the shelf label, suspend the transaction and call a supervisor for a price check. Do not override the price without authorisation.
- Card payment declined. Ask the customer to try again, then offer an alternative payment method. Never tell a customer why a card was declined, as that information is between the customer and their bank.
- POS system freeze or crash. Follow your SOP for system restarts. If the terminal cannot be recovered quickly, move the customer to another till and log the incident for your IT support team.
- Cash drawer will not open. Most POS systems have a manual release lever underneath the drawer. Use it only when the system has confirmed a completed transaction.
“Enforcing strict workflows with reason codes for manual price entries reduces loss and fraud, improving retail accountability. The same discipline that prevents errors at the till also protects your cashiers from unfair blame when discrepancies arise.”
Mixed payment handling deserves particular attention. Efficient handling of mixed payments demands POS systems that automatically calculate balances rather than relying on cashier mental arithmetic. If your current software forces cashiers to calculate remaining balances by hand, that is a configuration problem worth fixing before it causes a cash loss.
When an issue falls outside your standard troubleshooting steps, escalate immediately. Unusual exceptions, such as suspected counterfeit notes or a customer disputing a completed transaction, require a supervisor or manager. Your SOPs should define the escalation path clearly so cashiers never have to make that judgement alone.
How do you optimise checkout staffing and workflow for peak efficiency?
Staffing the checkout correctly is as important as running the transaction correctly. Too few cashiers during peak hours creates queues that drive customers away. Too many during quiet periods wastes wage budget.
Staffing checkout lanes by data-driven demand rather than habit greatly improves efficiency and customer service. Your POS analytics will show you transaction volumes by hour and day. Use that data to build a staffing rota that matches your busiest periods, typically weekend mornings, lunch hours, and the hour before closing.
Practical workflow improvements:
- Schedule a dedicated express lane for baskets under ten items during peak periods. Customers with small purchases move through faster, and the main lanes handle larger trolleys without pressure.
- Cross-train staff so that floor assistants can open a till at short notice when queues build unexpectedly.
- Use your POS reporting to identify which cashiers process transactions fastest and pair them with slower colleagues during training shifts.
- Review your retail POS workflows regularly, at least quarterly, to spot bottlenecks that have crept in as your product range or customer volume has changed.
Pro Tip: Place your most experienced cashier on the busiest lane during peak hours, not on the quietest one. Speed and accuracy under pressure come from experience, and that is where it counts most.
Self-checkout systems are worth considering for high-volume environments. Survey data from april 2026 shows that 62% of retail shoppers find self-checkout improves their experience by offering control and speed, with over 50% of Gen Z preferring self-checkout lanes. Clear visual design and multilingual support on self-checkout interfaces drive adoption further. Self-checkout does not replace trained cashiers, but it absorbs volume during peak periods and frees your team to handle complex transactions.
Key takeaways
A well-executed retail checkout process requires the right hardware, a clear transaction sequence, strict error-handling protocols, and staffing aligned to actual customer demand.
| Point | Details |
|---|---|
| Prepare before trading | Test all hardware daily and ensure every cashier has individual login credentials. |
| Follow the transaction sequence | Scan, confirm the total, process payment, and issue the receipt in the same order every time. |
| Use reason codes for manual entries | Log every manual price override with a reason code to prevent shrinkage and protect cashiers. |
| Match staffing to demand data | Use POS analytics to schedule lanes by peak period, not by habit or assumption. |
| Configure POS for mixed payments | Set your system to calculate split payment balances automatically to eliminate cashier arithmetic errors. |
What I have learned from years at the retail till
The biggest mistake I see retail operators make is treating checkout as the end of the process rather than the most critical part of it. Everything that happens on the shop floor, the merchandising, the promotions, the customer service, can be undone by a slow or error-prone till experience. Checkout is where the customer decides whether they will come back.
Speed matters, but accuracy matters more. A cashier who rushes through a transaction and gives incorrect change creates a problem that takes three times as long to resolve as the time saved. The operators who get this right are the ones who invest in training as seriously as they invest in hardware. A SAM4S terminal will not save you if your cashier does not know how to handle a mixed payment or a price query.
The shift toward modern POS technology is real and worth embracing. But the fundamentals, counting back change, logging reason codes, confirming totals with customers, remain as relevant as they were twenty years ago. The best checkout operations I have seen combine both: modern hardware running reliable software, operated by staff who understand the why behind every step, not just the what.
— John
Ycr’s POS hardware for a faster retail checkout
Ycr has supplied UK retailers with POS hardware and software for over three decades. The range covers everything a retail checkout station needs, from POS terminals and barcode scanners to receipt printers and EFT peripherals.
Ycr distributes SAM4S and iMin hardware alongside software solutions including SAMTOUCH and EZEEPOS, all designed for the demands of retail and hospitality environments. Whether you are setting up a single till or equipping a multi-lane checkout, the full hardware range covers every component covered in this guide. Next-day delivery and same-day dispatch mean you are not waiting when you need to act fast. Speak to the Ycr team to find the right configuration for your store.
FAQ
What is the retail checkout process?
The retail checkout process is the sequence of steps a cashier follows to complete a customer purchase, from scanning items and applying discounts to processing payment and issuing a receipt.
How do I handle a mixed payment at the till?
Apply the voucher or gift card value first, then process the remaining balance by cash or card. Use a POS system that calculates the remaining balance automatically to avoid errors.
Why do manual price entries need a reason code?
Manual price overrides without logged reason codes create a risk of shrinkage and fraud. Reason codes create an audit trail that protects both the business and the cashier.
How should I staff checkout lanes during peak hours?
Use your POS transaction data to identify peak periods by hour and day, then schedule lanes and cashiers to match that demand rather than relying on fixed rotas.
What should I do if the POS system crashes mid-transaction?
Follow your standard operating procedure for system restarts, move the customer to another till if available, and log the incident for your IT support team. Never attempt to complete a transaction manually without supervisor authorisation.